Guide to : Java Spring Boot Docker Container Image
#docker #java #spring #springboot #container #cloud
In this tutorial, let’s create a simple Docker container of a spring boot REST java application using a Dockerfile. The process mentioned in the article will also help to create reusable and redistributable code image.
What this tutorial will have ? 🤔:
Docker Java container with dynamic arguments
Image creation of spring boot rest Java application
Reusable container creation from locally hosted image
A GitHub link of all the code I used in this post.
One of the reason to use such container images in production environment.
Prerequisites ✅ :
JDK 17 (I am using AWS corretto 17)
Linux/macOS is preferred, but Windows is fine too.
Why spring is used in this example?
Because historically, when there were not many web frameworks, people used to prefer spring MVC/ spring boot. Even when there are plenty of better frameworks available in this era, spring is still used in legacy application as well as it has large community support than most JVM based web framework.
Before we proceed, I would like to gently encourage you to have a basic understanding of Docker and containers. If you feel you’d like to learn more, I have a post that offers some helpful insights. Please feel free to take a look at it when you have the time, here is the link ⬇️
Let’s have a look at code. 🧐
I created a really simple REST service in Java with the help of spring boot.
This is the directory structure of the code:
.
├── Dockerfile
├── README.md
├── pom.xml
└── src
    └── main
        ├── java
        │   └── com
        │       └── example
        │           └── spring_demo
        │               └── SpringDemoApplication.java
        └── resources
            └── application.properties
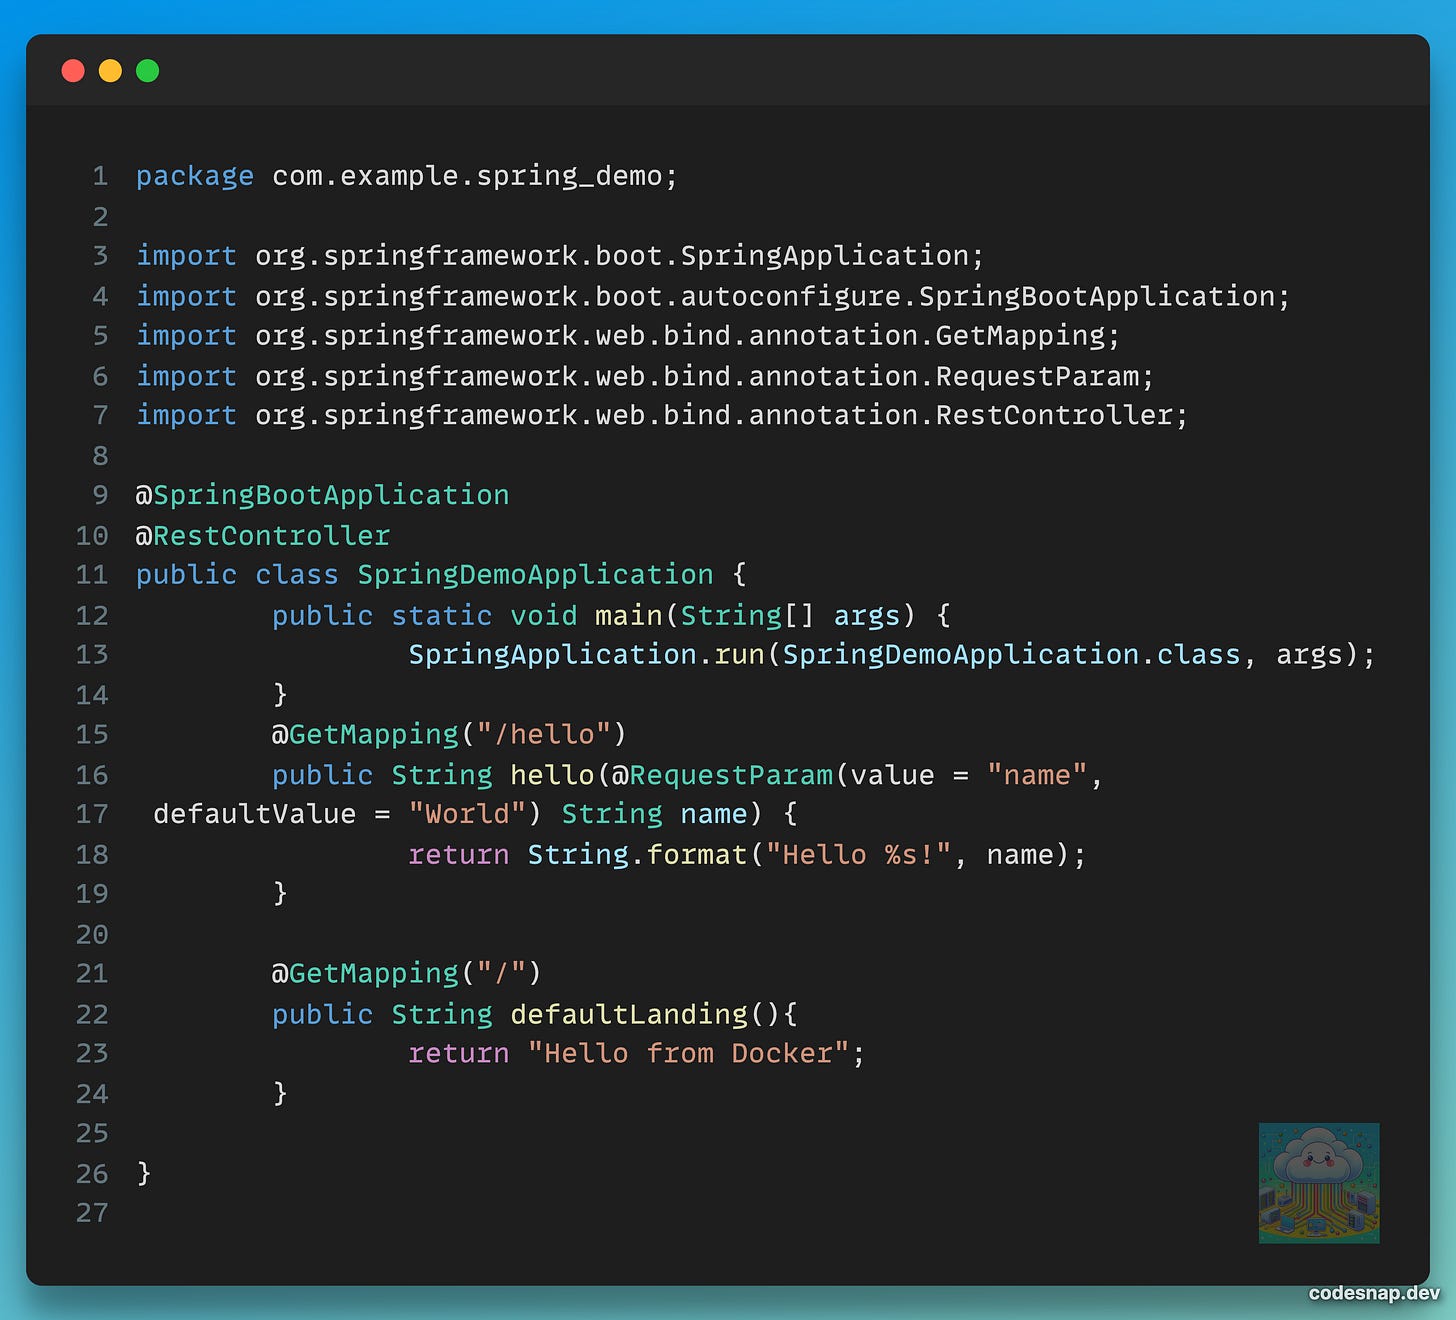
The main class SpringDemoApplication.java :
URL mappings:
/ : default is mapped to defaultLanding(), this will simply return ‘Hello from Docker‘
/hello :
is mapped to hello(), this will return extract value from URL parameter name and append to Hello string
Example:
/hello?name=ABCDwill return ‘Hello ABCD!‘
Dockerfile contents:
Look carefully at line 1, we are using maven:3.9-eclipse-temurin-17 as base image. We are using Eclipse Temurin 17 as JDK, this is the open source Java SE build based upon OpenJDK. This has GPLv2 with Classpath Exception license, which makes commercial use easy.
At line 5, we have created
jar_file_namewith default value, we are going to override this while building docker image. We will provide actual path of the jar file.At line 9, we have created
env_portas an environmental variable, this will be useful to provide a dynamic parameter at the time of running docker container.
Commands 💻 :
These are sample commands to build Dockerfile and run container:
1st line in above code is used to compile and generated final jar
3rd line is used to test if the code is working fine or not, once you enter this command the REST service will be available at http://localhost:8010. It is running at the port 8010 as we specified
—-server.port:8010Once you are done with the testing, you can kill it by CTRL + c or CMD + c.
5th line
builds docker image with the JAR file from target directory, and tag it with
spring-docker-demo.We also override the
jar_file_nameargument with actual jar file path that we built in previous stage.
You can check if image got created or not by entering
docker image listcommand, this will list all local images.7th line
will start the docker container with the JAR file.
while starting the container, we have provided value to
env_port,this will detect the port for the REST service running inside the container.-p 8008:8087 will do port forwarding between docker host port (8008) and docker container port (8087).
That’s all.
FYI, I used a Linux machine (Ubuntu 24.04) to run the above commands.
Why you should prefer using Docker images for production ? ⚙️
Docker images encapsulate applications and their dependencies in a consistent environment, ensuring reliable and predictable production deployments.
This promotes reusability across different environments, as images can be easily shared and version-controlled, reducing conflicts and streamlining updates. Overall, they enhance scalability and simplify the deployment process, leading to faster and more efficient software delivery.
This is applicable with OCI images.
Hey reader, since you've devoured every last word of this post like a champ, how about you reward yourself with a little email subscription ?
All code related to this tutorial is available here:


This is what I was looking for. Very apt description. Thanks for creating it buddy.